Unfortunately, an error occurred:
Unfortunately, an error occurred:
 02:48
02:48 How To Diagnose An Ignition Module Without Any Special Tools
How To Diagnose An Ignition Module Without Any Special Tools
This video is to help anyone diagnose whether or not their "NO SPARK PROBLEM" is due to a bad ignition module or wiring without using any special tools. This video is for engines without points.
Don’t forget to click the ???? to turn on Video Notifications for more money saving videos and tips, featuring all the brands like Stihl, Husky, Husqvarna, Honda, Echo, Tecumseh, Dolmar, Makita, Poulan, Ariens, Briggs and Stratton, Murray, John Deere, Craftsman, MTD, AYP, etc.
Help me make videos or buy me a beer!!
http://patreon.com/donyboy73
Connect with me on these social media spaces (plus that's where I announce contest winners)
Facebook: https://www.facebook.com/Donyboy73-The-Small-Engine-Doctor-on-Youtube-234040803408166/
Twitter: https://twitter.com/donyboy73
Instagram: https://www.instagram.com/donyboy73/
If you enjoy my videos be sure to comment, share, thumbs up and subscribe. Thanks for watching!
Easy to follow and thorough step by step tutorials do it yourself (DIY) to help you with your broken lawn and garden equipment including snowblowers.
I do my best to teach you how to easily diagnose problems the fastest, quickest and most efficient way with real repairs beyond just replacing a spark plug. These tips are for both the homeowner and shop owner.
Whether it be a handheld, two stroke, two cycle engine like a chainsaw, weed eater, weed wacker, string trimmer, grass trimmer, line trimmer, hedge trimmer, strimmer, brush cutter, leaf blower, or four stroke, four cycle units like a lawnmower, wood splitter, lawn tractor, snowblower, pressure washer, generator or a ride on mower that needs parts installed or replaced, I’m your go-to guy.
My favorite brands of spark plugs are NGK and Champion and are the ones I recommend.
I’ve been a small engine mechanic for many decades and also run my own repair shop so my videos are loaded with tips and tricks that I have learned and want to share with you. You will also find many tool and product reviews from top brands on my channel as well.
I have the largest Small Engine Repair Video Library on Youtube and the entire internet with over 1200 videos, just GOOGLE "DONYBOY73"!
I want "DON THE SMALL ENGINE DOCTOR" on Youtube to save you time, frustration and most importantly, MONEY with my HOW-TO videos!
Due to factors beyond the control of DONYBOY73 “The Small Engine Doctor”, it cannot guarantee against unauthorized modifications of this information, or improper use of this information. DONYBOY73 “The Small Engine Doctor” assumes no liability for property damage or injury incurred as a result of any of the information contained in this video. DONYBOY73 “The Small Engine Doctor” recommends safe practices when working with power tools, hand tools, lifting tools, jack stands, electrical equipment, blunt instruments, chemicals, lubricants, or any other tools or equipment seen or implied in this video. Due to factors beyond the control of DONYBOY73 “The Small Engine Doctor”, no information contained in this video shall create any express or implied warranty or guarantee of any particular result. Any injury, damage or loss that may result from improper use of these tools, equipment, or the information contained in this video is the sole responsibility of the user and not DONYBOY73 “The Small Engine Doctor".
#donyboy73 #db73 #smallenginerepair #how-to
 07:58
07:58 STIHL MS170 180 Chainsaw Clutch Removal & Installation
STIHL MS170 180 Chainsaw Clutch Removal & Installation
Watch my new HD version of this video here;
https://www.youtube.com/watch?v=SSuG2LPA4L0&t=4s
In this video donyboy73 shows how to remove and reinstall the clutch on your STIHL MS170 MS180
chainsaw.
Don’t forget to click the ???? to turn on Video Notifications for more money saving videos and tips, featuring all the brands like Stihl, Husky, Husqvarna, Honda, Echo, Tecumseh, Dolmar, Makita, Poulan, Ariens, Briggs and Stratton, Murray, John Deere, Craftsman, MTD, AYP, etc.
Help me make videos or buy me a beer!!
http://patreon.com/donyboy73
Piston stop tool used in video is part number 0000 893 5903
Watch my video on how to convert your ms170/180 to a side adjuster here;
https://www.youtube.com/watch?v=RnFd2NMWPYo
Connect with me on these social media spaces (plus that's where I announce contest winners)
Facebook: https://www.facebook.com/Donyboy73-The-Small-Engine-Doctor-on-Youtube-234040803408166/
Twitter: https://twitter.com/donyboy73
Instagram: https://www.instagram.com/donyboy73/
If you enjoy my videos make sure to comment, share, thumbs up and subscribe. Thanks for watching!
Easy to follow and thorough step by step tutorials do it yourself (DIY) to help you with your broken lawn and garden equipment including snowblowers.
I do my best to teach you how to easily diagnose problems the fastest, quickest and most efficient way with real repairs beyond just replacing a spark plug. These tips are for both the homeowner and shop owner.
Whether it be a handheld, two stroke, two cycle engine like a chainsaw, weed eater, weed wacker, string trimmer, grass trimmer, line trimmer, hedge trimmer, strimmer, brush cutter, leaf blower, or four stroke, four cycle units like a lawnmower, wood splitter, lawn tractor, snowblower, pressure washer, generator or a ride on mower that needs parts installed or replaced, I’m your go-to guy.
My favorite brands of spark plugs are NGK and Champion and are the ones I recommend.
I’ve been a small engine mechanic for many decades and also run my own repair shop so my videos are loaded with tips and tricks that I have learned and want to share with you. You will also find many tool and product reviews from top brands on my channel as well.
I have the largest Small Engine Repair Video Library on Youtube and the entire internet with over 1200 videos, just GOOGLE "DONYBOY73"!
I want "DON THE SMALL ENGINE DOCTOR" on Youtube to save you time, frustration and most importantly, MONEY with my HOW-TO videos!
Due to factors beyond the control of DONYBOY73 “The Small Engine Doctor”, it cannot guarantee against unauthorized modifications of this information, or improper use of this information. DONYBOY73 “The Small Engine Doctor” assumes no liability for property damage or injury incurred as a result of any of the information contained in this video. DONYBOY73 “The Small Engine Doctor” recommends safe practices when working with power tools, hand tools, lifting tools, jack stands, electrical equipment, blunt instruments, chemicals, lubricants, or any other tools or equipment seen or implied in this video. Due to factors beyond the control of DONYBOY73 “The Small Engine Doctor”, no information contained in this video shall create any express or implied warranty or guarantee of any particular result. Any injury, damage or loss that may result from improper use of these tools, equipment, or the information contained in this video is the sole responsibility of the user and not DONYBOY73 “The Small Engine Doctor".
#donyboy73 #db73 #stihl #ms170


 09:39
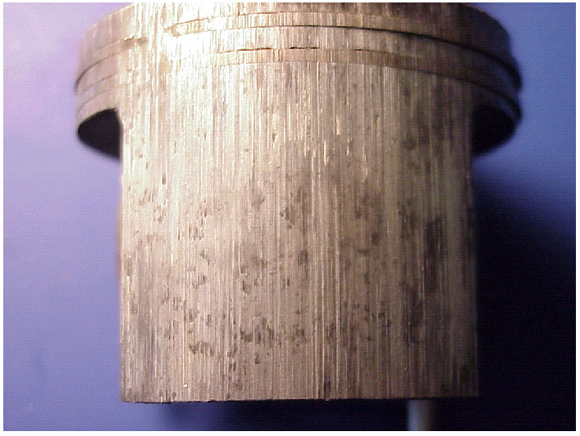
09:39 Small Engine Repair: Cleaning Carbon Buildup on the Exhaust Port & Muffler on a 2 Stroke Engine
Visit http://www.thesmallengineshop.net
**Always follow the instructions in your repair manual when doing repair or maintenance work on Outdoor Power Equipment. Manuals can be found at the manufacturers website.**
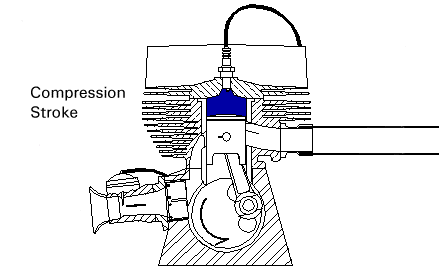
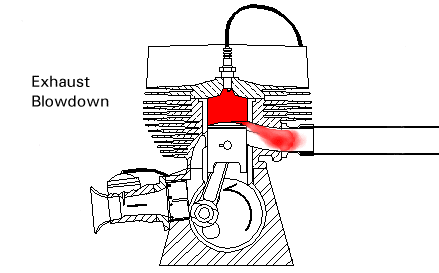
Small engines used in outdoor power equipment often suffer from carbon build up in the cylinder head, exhaust port and muffler. The is more common in 2 stroke engines than 4, but it does occur in both. In this video I inspect the exhaust port and muffler on a Echo SRM-230 trimmer. The muffler was very clean, but the exhaust port had carbon build up that blocked half the port. To clean the port, rotate the engine until the piston skirt is covering the exhaust port, and take a screw driver and lightly scrape the port to remove the carbon. Than take compressed air and blow out the port to remove the carbon pieces. Mufflers on small engines are usually sealed units, so cleaning them is very difficult if not impossible. Its easy and less expensive to replace a sealed muffler with a new one. Some mufflers have screens, which can be cleaned with a wire brush and compressed air.
This trimmer was run by the previous owner without a trimmer line knife attached to the deflector. This allows the trimmer line to extend beyond the manufacturers recommended length, and this causes a excessive load on the engine. I believe this is primary responsible for the carbon build up on the port.
**Always follow the instructions in your repair manual when doing repair or maintenance work on Outdoor Power Equipment. Manuals can be found at the manufacturers website.**
Small engines used in outdoor power equipment often suffer from carbon build up in the cylinder head, exhaust port and muffler. The is more common in 2 stroke engines than 4, but it does occur in both. In this video I inspect the exhaust port and muffler on a Echo SRM-230 trimmer. The muffler was very clean, but the exhaust port had carbon build up that blocked half the port. To clean the port, rotate the engine until the piston skirt is covering the exhaust port, and take a screw driver and lightly scrape the port to remove the carbon. Than take compressed air and blow out the port to remove the carbon pieces. Mufflers on small engines are usually sealed units, so cleaning them is very difficult if not impossible. Its easy and less expensive to replace a sealed muffler with a new one. Some mufflers have screens, which can be cleaned with a wire brush and compressed air.
This trimmer was run by the previous owner without a trimmer line knife attached to the deflector. This allows the trimmer line to extend beyond the manufacturers recommended length, and this causes a excessive load on the engine. I believe this is primary responsible for the carbon build up on the port.
 06:20
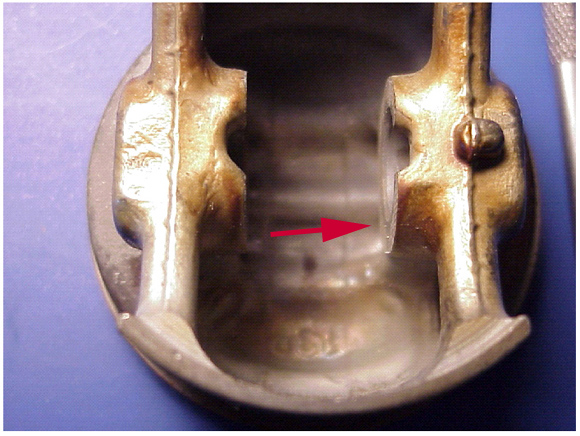
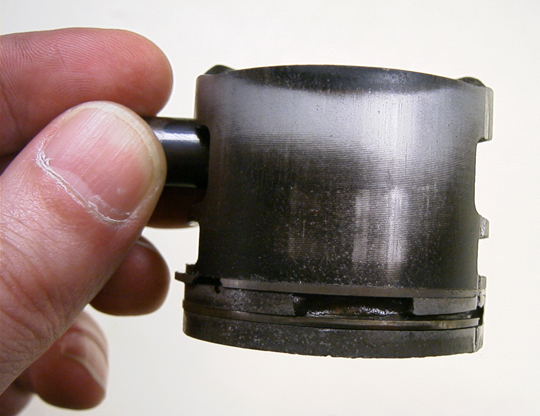
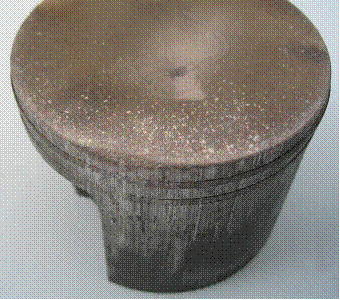
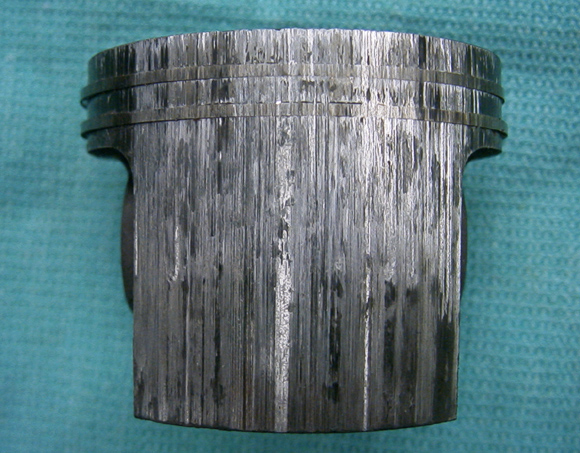
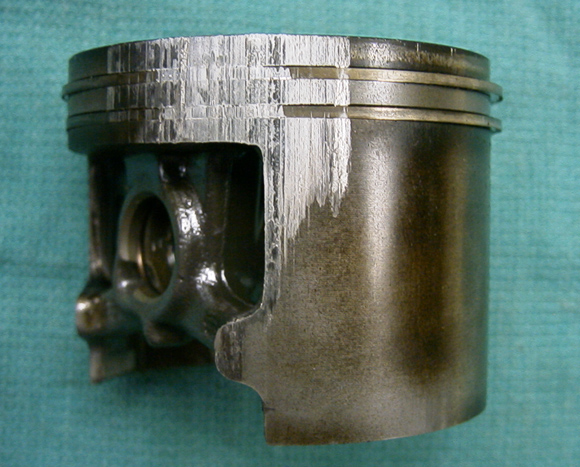
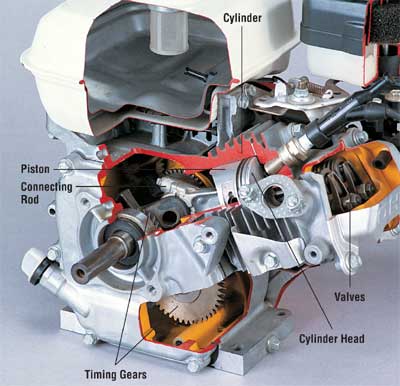
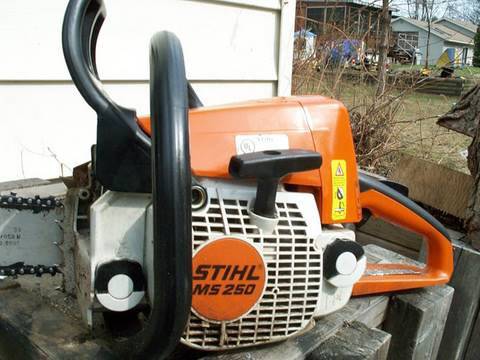
06:20 Repair of Stihl MS250 Chainsaw PARTIAL ENGINE REBUILD - Part 1 of 4
Repair of Stihl MS250 Chainsaw PARTIAL ENGINE REBUILD - Part 1 of 4
Assembling the cylinder, crankshaft and piston together. Visit my channel for more repair videos; http://www.youtube.com/user/donyboy73?feature=mhw5
Assembling the cylinder, crankshaft and piston together. Visit my channel for more repair videos; http://www.youtube.com/user/donyboy73?feature=mhw5
 06:49
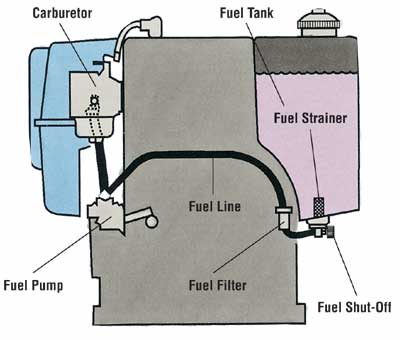
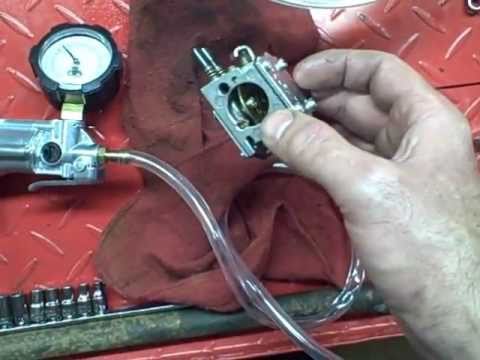
06:49 Small Engine Repair: Checking Fuel Pump Diaphragm & Inlet Needle on a Diaphragm Carburetor
Visit http://www.thesmallengineshop.net
**Always follow the instructions in your repair manual when doing repair or maintenance work on Outdoor Power Equipment. Manuals can be found at the manufacturers website.**
In this video I show how to check the fuel pump diaphragm and inlet needle for leaks on a diaphragm carburetor. A diaphragm carburetor is used on hand held power equipment, and are popular because they will work in any position. All chainsaws, trimmers and blowers that I have seen use a diaphragm carburetor. To check the fuel pump and inlet needle, pressurize the carburetor to 10 psi through the fuel inlet. The carburetor should hold the pressure fairly steady, and if it doesn't than there is a leak around the fuel pump diaphragm or inlet needle. You can pin point the leak by dunking the carburetor in water while it is pressurized. If the leak is around the fuel pump diaphragm, than either the fuel pump diaphragm, fuel pump diaphragm cover or the body of the carburetor is at fault. If the leak is coming out of the venturi, than the inlet needle or seat is faulty.
Tools used:
- 3/8" wrench to remove carburetor
- Mityvac to pressurize the carburetor
- Needle Nose plyers
Specifications:
- Carburetor should be pressurized to 10psi through the fuel inlet. Never exceed 10psi. Its important to run fuel through the carburetor before testing. A wet carburetor will hold the pressure better than a dry one.
 03:40
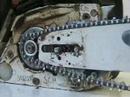
03:40 Replacing A Drive Sprocket (Stihl Chainsaw)
This video from http://drivelink.blogspot.com shows you how to remove and refit the drive sprocket on a Stihl chainsaw (MS260 shown in the video).
 07:05
07:05 Electric Clutch Adjusting and Troubleshooting for Lawn Mowers
This video describes how to adjust an electric clutch on a lawn mower.
 06:26
06:26 Chainsaws : Correct Chain Tension
How to do-it-yourself instructional on adjusting a chainsaw for correct chain tension. Shown on Stihl 038AV Super Pro.
Transcript provided for the hearing impaired:
Alright today on Repairs101 I'm going to show you how to set up proper chain tension on your chainsaw. For almost ten years I made my living working behind a chainsaw. And, this is one of them. I'm partial to the Stihls. I do recognize that Husqvarna and Sachs-Dolmar and Echo all make excellent products --other manufacturers do as well. I'm just accustomed to and therefore partial to the Stihls. I find them exceptionally tough. reliable. And, this one here is a thirty-eight super-pro that I've had for twenty years or thereabouts and it still pulls like a Saint Bernard going after a squirrel. I always keep my saws disassembled so we'll pop the cover off and put the bar back on. the first thing I'll show you is you might as well clean it up while you're in here. If you've got compressed air that's going to be the best thing but if you're out in the woods or up a tree, you're not going to have compressed air. So have a rag handy and try to get any big chunks away from the sprocket, because if they get caught in between the chain and the sprocket it's going to affect your chain tension. Eventually it will destroy or throw it out and then the chain tension will be lost. OK now something in particular you want to focus on cleaning is the chain adjusting screw. If you're out in the bush you're probably just going to have -- and just dig at it very roughly and crudely but of course in the shop you should be able to have something more elegant. I like to use my ex-girlfriend's toothbrush. There you go. And we're ready to put the bar on. People call this the blade but of course it's not a blade it's called a bar. The bar has no top, no bottom. You'll find that one side will wear out. When it does, all you need to do is grab a flat file -- you want to hold it in your vise. And just cut off the high edges with your flat file. Alright the next thing is to get your chain on. It's not a bad idea to grease the roller tip, the sprocket on the end. the idea is make sure you get your chain on the right way. Whether you've got chisel chain or chipper chain of course they pull forward -- that is away from your body -- on top. Now once you've determined which way your chain is going to go on, put it on the bar and bring the bar up to the mounting studs and then swing the chain overtop of the sprocket like that. Here's the adjusting screw and here's the adjusting pin. Now I'll just leave my finger there and you can see it tracking. This screw is moving this pin -- currently I'm going forward and going forward will be pushing the chainsaw's bar out and therefore increasing the tension on it. The next thing to show you would be these holes right here on the bar -- one on either side. OK and what they do is ride on that pin. So we just keep the chain in the bar's groove. It doesn't matter how slack it hangs. And then you just want to mount it like that, get the chain all in underneath. Now you can see that I've left just a ton of slack here and what we'll do is get the cover back on real quick and then take the slack out using that adjusting screw. I've just seated these very, very loosely and as you can see the chain is way too loose here. we're just going to turn it this way to gain access to the adjusting screw. And then, one of the critical things I learned was that it's very important to hold the nose of the bar up when you're making the adjustment and when you're doing the final tightening. As I turn this screw the chain. Now you can see it's getting very close. Pull down on it a little bit and there's quite a bit of teeth still showing... so I'm going to pull up on it some more and now although I can expose some teeth -- and it looks like if I pull real hard I can expose perhaps three to perhaps five. It snaps back nice and at the same time the chain runs really smoothly. I know I'm good to tighten this up and I've got correct chain tension. It's very important that you only pull the chain towards yourself on the top like that and it's a good idea to wear a glove or have a rag on your hand or something like that so that you don't get cut. But never ever try and pull the chain in the other directon OK because you're going to cut yourself on the chisels. Now there's no question that it's going to loosen up after you've run it for a bit. The chain is going to heat and expand and the chain will loosen up. It is a little on the snug side. Trust me. That's what you want. A little on the snug side and yet still free running like that. I have no problem rotating it with your hand but at the same time you can't pull very much out of it and when you leave it cold -- now I'm talking cold before you've used the saw at all: you do not want to see any slack hanging here. It's just not safe having slack like that on the chain.
 08:37
08:37 Engine Rebuild On Husqvarna 55 & 51 Chainsaw Part 2/3
Learn How To Rebuild the engine on your Chainsaw in this easy to follow video tutorial.
Visit my channel for more repair videos; http://www.youtube.com/user/donyboy73?feature=mhw5
Visit my channel for more repair videos; http://www.youtube.com/user/donyboy73?feature=mhw5
 03:17
03:17 Stihl MS192T Chainsaw Repair (MUST SEE)
Watch this video to see what a clogged spark arrester screen will cause. Very easy repair.
Visit my channel for more repair videos; http://www.youtube.com/user/donyboy73?feature=mhw5
#donyboy73
Visit my channel for more repair videos; http://www.youtube.com/user/donyboy73?feature=mhw5
#donyboy73
12
Unfortunately, an error occurred:
02:48 How To Diagnose An Ignition Module Without Any Special Tools
How To Diagnose An Ignition Module Without Any Special Tools
This video is to help anyone diagnose whether or not their "NO SPARK PROBLEM" is due to a bad ignition module or wiring without using any special tools. This video is for engines without points.
Don’t forget to click the ???? to turn on Video Notifications for more money saving videos and tips, featuring all the brands like Stihl, Husky, Husqvarna, Honda, Echo, Tecumseh, Dolmar, Makita, Poulan, Ariens, Briggs and Stratton, Murray, John Deere, Craftsman, MTD, AYP, etc.
Help me make videos or buy me a beer!!
http://patreon.com/donyboy73
Connect with me on these social media spaces (plus that's where I announce contest winners)
Facebook: https://www.facebook.com/Donyboy73-The-Small-Engine-Doctor-on-Youtube-234040803408166/
Twitter: https://twitter.com/donyboy73
Instagram: https://www.instagram.com/donyboy73/
If you enjoy my videos be sure to comment, share, thumbs up and subscribe. Thanks for watching!
Easy to follow and thorough step by step tutorials do it yourself (DIY) to help you with your broken lawn and garden equipment including snowblowers.
I do my best to teach you how to easily diagnose problems the fastest, quickest and most efficient way with real repairs beyond just replacing a spark plug. These tips are for both the homeowner and shop owner.
Whether it be a handheld, two stroke, two cycle engine like a chainsaw, weed eater, weed wacker, string trimmer, grass trimmer, line trimmer, hedge trimmer, strimmer, brush cutter, leaf blower, or four stroke, four cycle units like a lawnmower, wood splitter, lawn tractor, snowblower, pressure washer, generator or a ride on mower that needs parts installed or replaced, I’m your go-to guy.
My favorite brands of spark plugs are NGK and Champion and are the ones I recommend.
I’ve been a small engine mechanic for many decades and also run my own repair shop so my videos are loaded with tips and tricks that I have learned and want to share with you. You will also find many tool and product reviews from top brands on my channel as well.
I have the largest Small Engine Repair Video Library on Youtube and the entire internet with over 1200 videos, just GOOGLE "DONYBOY73"!
I want "DON THE SMALL ENGINE DOCTOR" on Youtube to save you time, frustration and most importantly, MONEY with my HOW-TO videos!
Due to factors beyond the control of DONYBOY73 “The Small Engine Doctor”, it cannot guarantee against unauthorized modifications of this information, or improper use of this information. DONYBOY73 “The Small Engine Doctor” assumes no liability for property damage or injury incurred as a result of any of the information contained in this video. DONYBOY73 “The Small Engine Doctor” recommends safe practices when working with power tools, hand tools, lifting tools, jack stands, electrical equipment, blunt instruments, chemicals, lubricants, or any other tools or equipment seen or implied in this video. Due to factors beyond the control of DONYBOY73 “The Small Engine Doctor”, no information contained in this video shall create any express or implied warranty or guarantee of any particular result. Any injury, damage or loss that may result from improper use of these tools, equipment, or the information contained in this video is the sole responsibility of the user and not DONYBOY73 “The Small Engine Doctor".
#donyboy73 #db73 #smallenginerepair #how-to
This video is to help anyone diagnose whether or not their "NO SPARK PROBLEM" is due to a bad ignition module or wiring without using any special tools. This video is for engines without points.
Don’t forget to click the ???? to turn on Video Notifications for more money saving videos and tips, featuring all the brands like Stihl, Husky, Husqvarna, Honda, Echo, Tecumseh, Dolmar, Makita, Poulan, Ariens, Briggs and Stratton, Murray, John Deere, Craftsman, MTD, AYP, etc.
Help me make videos or buy me a beer!!
http://patreon.com/donyboy73
Connect with me on these social media spaces (plus that's where I announce contest winners)
Facebook: https://www.facebook.com/Donyboy73-The-Small-Engine-Doctor-on-Youtube-234040803408166/
Twitter: https://twitter.com/donyboy73
Instagram: https://www.instagram.com/donyboy73/
If you enjoy my videos be sure to comment, share, thumbs up and subscribe. Thanks for watching!
Easy to follow and thorough step by step tutorials do it yourself (DIY) to help you with your broken lawn and garden equipment including snowblowers.
I do my best to teach you how to easily diagnose problems the fastest, quickest and most efficient way with real repairs beyond just replacing a spark plug. These tips are for both the homeowner and shop owner.
Whether it be a handheld, two stroke, two cycle engine like a chainsaw, weed eater, weed wacker, string trimmer, grass trimmer, line trimmer, hedge trimmer, strimmer, brush cutter, leaf blower, or four stroke, four cycle units like a lawnmower, wood splitter, lawn tractor, snowblower, pressure washer, generator or a ride on mower that needs parts installed or replaced, I’m your go-to guy.
My favorite brands of spark plugs are NGK and Champion and are the ones I recommend.
I’ve been a small engine mechanic for many decades and also run my own repair shop so my videos are loaded with tips and tricks that I have learned and want to share with you. You will also find many tool and product reviews from top brands on my channel as well.
I have the largest Small Engine Repair Video Library on Youtube and the entire internet with over 1200 videos, just GOOGLE "DONYBOY73"!
I want "DON THE SMALL ENGINE DOCTOR" on Youtube to save you time, frustration and most importantly, MONEY with my HOW-TO videos!
Due to factors beyond the control of DONYBOY73 “The Small Engine Doctor”, it cannot guarantee against unauthorized modifications of this information, or improper use of this information. DONYBOY73 “The Small Engine Doctor” assumes no liability for property damage or injury incurred as a result of any of the information contained in this video. DONYBOY73 “The Small Engine Doctor” recommends safe practices when working with power tools, hand tools, lifting tools, jack stands, electrical equipment, blunt instruments, chemicals, lubricants, or any other tools or equipment seen or implied in this video. Due to factors beyond the control of DONYBOY73 “The Small Engine Doctor”, no information contained in this video shall create any express or implied warranty or guarantee of any particular result. Any injury, damage or loss that may result from improper use of these tools, equipment, or the information contained in this video is the sole responsibility of the user and not DONYBOY73 “The Small Engine Doctor".
#donyboy73 #db73 #smallenginerepair #how-to
07:58 STIHL MS170 180 Chainsaw Clutch Removal & Installation
STIHL MS170 180 Chainsaw Clutch Removal & Installation
Watch my new HD version of this video here;
https://www.youtube.com/watch?v=SSuG2LPA4L0&t=4s
In this video donyboy73 shows how to remove and reinstall the clutch on your STIHL MS170 MS180
chainsaw.
Don’t forget to click the ???? to turn on Video Notifications for more money saving videos and tips, featuring all the brands like Stihl, Husky, Husqvarna, Honda, Echo, Tecumseh, Dolmar, Makita, Poulan, Ariens, Briggs and Stratton, Murray, John Deere, Craftsman, MTD, AYP, etc.
Help me make videos or buy me a beer!!
http://patreon.com/donyboy73
Piston stop tool used in video is part number 0000 893 5903
Watch my video on how to convert your ms170/180 to a side adjuster here;
https://www.youtube.com/watch?v=RnFd2NMWPYo
Connect with me on these social media spaces (plus that's where I announce contest winners)
Facebook: https://www.facebook.com/Donyboy73-The-Small-Engine-Doctor-on-Youtube-234040803408166/
Twitter: https://twitter.com/donyboy73
Instagram: https://www.instagram.com/donyboy73/
If you enjoy my videos make sure to comment, share, thumbs up and subscribe. Thanks for watching!
Easy to follow and thorough step by step tutorials do it yourself (DIY) to help you with your broken lawn and garden equipment including snowblowers.
I do my best to teach you how to easily diagnose problems the fastest, quickest and most efficient way with real repairs beyond just replacing a spark plug. These tips are for both the homeowner and shop owner.
Whether it be a handheld, two stroke, two cycle engine like a chainsaw, weed eater, weed wacker, string trimmer, grass trimmer, line trimmer, hedge trimmer, strimmer, brush cutter, leaf blower, or four stroke, four cycle units like a lawnmower, wood splitter, lawn tractor, snowblower, pressure washer, generator or a ride on mower that needs parts installed or replaced, I’m your go-to guy.
My favorite brands of spark plugs are NGK and Champion and are the ones I recommend.
I’ve been a small engine mechanic for many decades and also run my own repair shop so my videos are loaded with tips and tricks that I have learned and want to share with you. You will also find many tool and product reviews from top brands on my channel as well.
I have the largest Small Engine Repair Video Library on Youtube and the entire internet with over 1200 videos, just GOOGLE "DONYBOY73"!
I want "DON THE SMALL ENGINE DOCTOR" on Youtube to save you time, frustration and most importantly, MONEY with my HOW-TO videos!
Due to factors beyond the control of DONYBOY73 “The Small Engine Doctor”, it cannot guarantee against unauthorized modifications of this information, or improper use of this information. DONYBOY73 “The Small Engine Doctor” assumes no liability for property damage or injury incurred as a result of any of the information contained in this video. DONYBOY73 “The Small Engine Doctor” recommends safe practices when working with power tools, hand tools, lifting tools, jack stands, electrical equipment, blunt instruments, chemicals, lubricants, or any other tools or equipment seen or implied in this video. Due to factors beyond the control of DONYBOY73 “The Small Engine Doctor”, no information contained in this video shall create any express or implied warranty or guarantee of any particular result. Any injury, damage or loss that may result from improper use of these tools, equipment, or the information contained in this video is the sole responsibility of the user and not DONYBOY73 “The Small Engine Doctor".
#donyboy73 #db73 #stihl #ms170
Watch my new HD version of this video here;
https://www.youtube.com/watch?v=SSuG2LPA4L0&t=4s
In this video donyboy73 shows how to remove and reinstall the clutch on your STIHL MS170 MS180
chainsaw.
Don’t forget to click the ???? to turn on Video Notifications for more money saving videos and tips, featuring all the brands like Stihl, Husky, Husqvarna, Honda, Echo, Tecumseh, Dolmar, Makita, Poulan, Ariens, Briggs and Stratton, Murray, John Deere, Craftsman, MTD, AYP, etc.
Help me make videos or buy me a beer!!
http://patreon.com/donyboy73
Piston stop tool used in video is part number 0000 893 5903
Watch my video on how to convert your ms170/180 to a side adjuster here;
https://www.youtube.com/watch?v=RnFd2NMWPYo
Connect with me on these social media spaces (plus that's where I announce contest winners)
Facebook: https://www.facebook.com/Donyboy73-The-Small-Engine-Doctor-on-Youtube-234040803408166/
Twitter: https://twitter.com/donyboy73
Instagram: https://www.instagram.com/donyboy73/
If you enjoy my videos make sure to comment, share, thumbs up and subscribe. Thanks for watching!
Easy to follow and thorough step by step tutorials do it yourself (DIY) to help you with your broken lawn and garden equipment including snowblowers.
I do my best to teach you how to easily diagnose problems the fastest, quickest and most efficient way with real repairs beyond just replacing a spark plug. These tips are for both the homeowner and shop owner.
Whether it be a handheld, two stroke, two cycle engine like a chainsaw, weed eater, weed wacker, string trimmer, grass trimmer, line trimmer, hedge trimmer, strimmer, brush cutter, leaf blower, or four stroke, four cycle units like a lawnmower, wood splitter, lawn tractor, snowblower, pressure washer, generator or a ride on mower that needs parts installed or replaced, I’m your go-to guy.
My favorite brands of spark plugs are NGK and Champion and are the ones I recommend.
I’ve been a small engine mechanic for many decades and also run my own repair shop so my videos are loaded with tips and tricks that I have learned and want to share with you. You will also find many tool and product reviews from top brands on my channel as well.
I have the largest Small Engine Repair Video Library on Youtube and the entire internet with over 1200 videos, just GOOGLE "DONYBOY73"!
I want "DON THE SMALL ENGINE DOCTOR" on Youtube to save you time, frustration and most importantly, MONEY with my HOW-TO videos!
Due to factors beyond the control of DONYBOY73 “The Small Engine Doctor”, it cannot guarantee against unauthorized modifications of this information, or improper use of this information. DONYBOY73 “The Small Engine Doctor” assumes no liability for property damage or injury incurred as a result of any of the information contained in this video. DONYBOY73 “The Small Engine Doctor” recommends safe practices when working with power tools, hand tools, lifting tools, jack stands, electrical equipment, blunt instruments, chemicals, lubricants, or any other tools or equipment seen or implied in this video. Due to factors beyond the control of DONYBOY73 “The Small Engine Doctor”, no information contained in this video shall create any express or implied warranty or guarantee of any particular result. Any injury, damage or loss that may result from improper use of these tools, equipment, or the information contained in this video is the sole responsibility of the user and not DONYBOY73 “The Small Engine Doctor".
#donyboy73 #db73 #stihl #ms170
09:39 Small Engine Repair: Cleaning Carbon Buildup on the Exhaust Port & Muffler on a 2 Stroke Engine
Visit http://www.thesmallengineshop.net
**Always follow the instructions in your repair manual when doing repair or maintenance work on Outdoor Power Equipment. Manuals can be found at the manufacturers website.**
Small engines used in outdoor power equipment often suffer from carbon build up in the cylinder head, exhaust port and muffler. The is more common in 2 stroke engines than 4, but it does occur in both. In this video I inspect the exhaust port and muffler on a Echo SRM-230 trimmer. The muffler was very clean, but the exhaust port had carbon build up that blocked half the port. To clean the port, rotate the engine until the piston skirt is covering the exhaust port, and take a screw driver and lightly scrape the port to remove the carbon. Than take compressed air and blow out the port to remove the carbon pieces. Mufflers on small engines are usually sealed units, so cleaning them is very difficult if not impossible. Its easy and less expensive to replace a sealed muffler with a new one. Some mufflers have screens, which can be cleaned with a wire brush and compressed air.
This trimmer was run by the previous owner without a trimmer line knife attached to the deflector. This allows the trimmer line to extend beyond the manufacturers recommended length, and this causes a excessive load on the engine. I believe this is primary responsible for the carbon build up on the port.
06:20 Repair of Stihl MS250 Chainsaw PARTIAL ENGINE REBUILD - Part 1 of 4
Repair of Stihl MS250 Chainsaw PARTIAL ENGINE REBUILD - Part 1 of 4
Assembling the cylinder, crankshaft and piston together. Visit my channel for more repair videos; http://www.youtube.com/user/donyboy73?feature=mhw5
Assembling the cylinder, crankshaft and piston together. Visit my channel for more repair videos; http://www.youtube.com/user/donyboy73?feature=mhw5
06:49 Small Engine Repair: Checking Fuel Pump Diaphragm & Inlet Needle on a Diaphragm Carburetor
Visit http://www.thesmallengineshop.net
**Always follow the instructions in your repair manual when doing repair or maintenance work on Outdoor Power Equipment. Manuals can be found at the manufacturers website.**
In this video I show how to check the fuel pump diaphragm and inlet needle for leaks on a diaphragm carburetor. A diaphragm carburetor is used on hand held power equipment, and are popular because they will work in any position. All chainsaws, trimmers and blowers that I have seen use a diaphragm carburetor. To check the fuel pump and inlet needle, pressurize the carburetor to 10 psi through the fuel inlet. The carburetor should hold the pressure fairly steady, and if it doesn't than there is a leak around the fuel pump diaphragm or inlet needle. You can pin point the leak by dunking the carburetor in water while it is pressurized. If the leak is around the fuel pump diaphragm, than either the fuel pump diaphragm, fuel pump diaphragm cover or the body of the carburetor is at fault. If the leak is coming out of the venturi, than the inlet needle or seat is faulty.
Tools used:
- 3/8" wrench to remove carburetor
- Mityvac to pressurize the carburetor
- Needle Nose plyers
Specifications:
- Carburetor should be pressurized to 10psi through the fuel inlet. Never exceed 10psi. Its important to run fuel through the carburetor before testing. A wet carburetor will hold the pressure better than a dry one.
**Always follow the instructions in your repair manual when doing repair or maintenance work on Outdoor Power Equipment. Manuals can be found at the manufacturers website.**
In this video I show how to check the fuel pump diaphragm and inlet needle for leaks on a diaphragm carburetor. A diaphragm carburetor is used on hand held power equipment, and are popular because they will work in any position. All chainsaws, trimmers and blowers that I have seen use a diaphragm carburetor. To check the fuel pump and inlet needle, pressurize the carburetor to 10 psi through the fuel inlet. The carburetor should hold the pressure fairly steady, and if it doesn't than there is a leak around the fuel pump diaphragm or inlet needle. You can pin point the leak by dunking the carburetor in water while it is pressurized. If the leak is around the fuel pump diaphragm, than either the fuel pump diaphragm, fuel pump diaphragm cover or the body of the carburetor is at fault. If the leak is coming out of the venturi, than the inlet needle or seat is faulty.
Tools used:
- 3/8" wrench to remove carburetor
- Mityvac to pressurize the carburetor
- Needle Nose plyers
Specifications:
- Carburetor should be pressurized to 10psi through the fuel inlet. Never exceed 10psi. Its important to run fuel through the carburetor before testing. A wet carburetor will hold the pressure better than a dry one.
03:40 Replacing A Drive Sprocket (Stihl Chainsaw)
This video from http://drivelink.blogspot.com shows you how to remove and refit the drive sprocket on a Stihl chainsaw (MS260 shown in the video).
07:05 Electric Clutch Adjusting and Troubleshooting for Lawn Mowers
This video describes how to adjust an electric clutch on a lawn mower.
06:26 Chainsaws : Correct Chain Tension
How to do-it-yourself instructional on adjusting a chainsaw for correct chain tension. Shown on Stihl 038AV Super Pro.
Transcript provided for the hearing impaired:
Alright today on Repairs101 I'm going to show you how to set up proper chain tension on your chainsaw. For almost ten years I made my living working behind a chainsaw. And, this is one of them. I'm partial to the Stihls. I do recognize that Husqvarna and Sachs-Dolmar and Echo all make excellent products --other manufacturers do as well. I'm just accustomed to and therefore partial to the Stihls. I find them exceptionally tough. reliable. And, this one here is a thirty-eight super-pro that I've had for twenty years or thereabouts and it still pulls like a Saint Bernard going after a squirrel. I always keep my saws disassembled so we'll pop the cover off and put the bar back on. the first thing I'll show you is you might as well clean it up while you're in here. If you've got compressed air that's going to be the best thing but if you're out in the woods or up a tree, you're not going to have compressed air. So have a rag handy and try to get any big chunks away from the sprocket, because if they get caught in between the chain and the sprocket it's going to affect your chain tension. Eventually it will destroy or throw it out and then the chain tension will be lost. OK now something in particular you want to focus on cleaning is the chain adjusting screw. If you're out in the bush you're probably just going to have -- and just dig at it very roughly and crudely but of course in the shop you should be able to have something more elegant. I like to use my ex-girlfriend's toothbrush. There you go. And we're ready to put the bar on. People call this the blade but of course it's not a blade it's called a bar. The bar has no top, no bottom. You'll find that one side will wear out. When it does, all you need to do is grab a flat file -- you want to hold it in your vise. And just cut off the high edges with your flat file. Alright the next thing is to get your chain on. It's not a bad idea to grease the roller tip, the sprocket on the end. the idea is make sure you get your chain on the right way. Whether you've got chisel chain or chipper chain of course they pull forward -- that is away from your body -- on top. Now once you've determined which way your chain is going to go on, put it on the bar and bring the bar up to the mounting studs and then swing the chain overtop of the sprocket like that. Here's the adjusting screw and here's the adjusting pin. Now I'll just leave my finger there and you can see it tracking. This screw is moving this pin -- currently I'm going forward and going forward will be pushing the chainsaw's bar out and therefore increasing the tension on it. The next thing to show you would be these holes right here on the bar -- one on either side. OK and what they do is ride on that pin. So we just keep the chain in the bar's groove. It doesn't matter how slack it hangs. And then you just want to mount it like that, get the chain all in underneath. Now you can see that I've left just a ton of slack here and what we'll do is get the cover back on real quick and then take the slack out using that adjusting screw. I've just seated these very, very loosely and as you can see the chain is way too loose here. we're just going to turn it this way to gain access to the adjusting screw. And then, one of the critical things I learned was that it's very important to hold the nose of the bar up when you're making the adjustment and when you're doing the final tightening. As I turn this screw the chain. Now you can see it's getting very close. Pull down on it a little bit and there's quite a bit of teeth still showing... so I'm going to pull up on it some more and now although I can expose some teeth -- and it looks like if I pull real hard I can expose perhaps three to perhaps five. It snaps back nice and at the same time the chain runs really smoothly. I know I'm good to tighten this up and I've got correct chain tension. It's very important that you only pull the chain towards yourself on the top like that and it's a good idea to wear a glove or have a rag on your hand or something like that so that you don't get cut. But never ever try and pull the chain in the other directon OK because you're going to cut yourself on the chisels. Now there's no question that it's going to loosen up after you've run it for a bit. The chain is going to heat and expand and the chain will loosen up. It is a little on the snug side. Trust me. That's what you want. A little on the snug side and yet still free running like that. I have no problem rotating it with your hand but at the same time you can't pull very much out of it and when you leave it cold -- now I'm talking cold before you've used the saw at all: you do not want to see any slack hanging here. It's just not safe having slack like that on the chain.
Transcript provided for the hearing impaired:
Alright today on Repairs101 I'm going to show you how to set up proper chain tension on your chainsaw. For almost ten years I made my living working behind a chainsaw. And, this is one of them. I'm partial to the Stihls. I do recognize that Husqvarna and Sachs-Dolmar and Echo all make excellent products --other manufacturers do as well. I'm just accustomed to and therefore partial to the Stihls. I find them exceptionally tough. reliable. And, this one here is a thirty-eight super-pro that I've had for twenty years or thereabouts and it still pulls like a Saint Bernard going after a squirrel. I always keep my saws disassembled so we'll pop the cover off and put the bar back on. the first thing I'll show you is you might as well clean it up while you're in here. If you've got compressed air that's going to be the best thing but if you're out in the woods or up a tree, you're not going to have compressed air. So have a rag handy and try to get any big chunks away from the sprocket, because if they get caught in between the chain and the sprocket it's going to affect your chain tension. Eventually it will destroy or throw it out and then the chain tension will be lost. OK now something in particular you want to focus on cleaning is the chain adjusting screw. If you're out in the bush you're probably just going to have -- and just dig at it very roughly and crudely but of course in the shop you should be able to have something more elegant. I like to use my ex-girlfriend's toothbrush. There you go. And we're ready to put the bar on. People call this the blade but of course it's not a blade it's called a bar. The bar has no top, no bottom. You'll find that one side will wear out. When it does, all you need to do is grab a flat file -- you want to hold it in your vise. And just cut off the high edges with your flat file. Alright the next thing is to get your chain on. It's not a bad idea to grease the roller tip, the sprocket on the end. the idea is make sure you get your chain on the right way. Whether you've got chisel chain or chipper chain of course they pull forward -- that is away from your body -- on top. Now once you've determined which way your chain is going to go on, put it on the bar and bring the bar up to the mounting studs and then swing the chain overtop of the sprocket like that. Here's the adjusting screw and here's the adjusting pin. Now I'll just leave my finger there and you can see it tracking. This screw is moving this pin -- currently I'm going forward and going forward will be pushing the chainsaw's bar out and therefore increasing the tension on it. The next thing to show you would be these holes right here on the bar -- one on either side. OK and what they do is ride on that pin. So we just keep the chain in the bar's groove. It doesn't matter how slack it hangs. And then you just want to mount it like that, get the chain all in underneath. Now you can see that I've left just a ton of slack here and what we'll do is get the cover back on real quick and then take the slack out using that adjusting screw. I've just seated these very, very loosely and as you can see the chain is way too loose here. we're just going to turn it this way to gain access to the adjusting screw. And then, one of the critical things I learned was that it's very important to hold the nose of the bar up when you're making the adjustment and when you're doing the final tightening. As I turn this screw the chain. Now you can see it's getting very close. Pull down on it a little bit and there's quite a bit of teeth still showing... so I'm going to pull up on it some more and now although I can expose some teeth -- and it looks like if I pull real hard I can expose perhaps three to perhaps five. It snaps back nice and at the same time the chain runs really smoothly. I know I'm good to tighten this up and I've got correct chain tension. It's very important that you only pull the chain towards yourself on the top like that and it's a good idea to wear a glove or have a rag on your hand or something like that so that you don't get cut. But never ever try and pull the chain in the other directon OK because you're going to cut yourself on the chisels. Now there's no question that it's going to loosen up after you've run it for a bit. The chain is going to heat and expand and the chain will loosen up. It is a little on the snug side. Trust me. That's what you want. A little on the snug side and yet still free running like that. I have no problem rotating it with your hand but at the same time you can't pull very much out of it and when you leave it cold -- now I'm talking cold before you've used the saw at all: you do not want to see any slack hanging here. It's just not safe having slack like that on the chain.
08:37 Engine Rebuild On Husqvarna 55 & 51 Chainsaw Part 2/3
Learn How To Rebuild the engine on your Chainsaw in this easy to follow video tutorial.
Visit my channel for more repair videos; http://www.youtube.com/user/donyboy73?feature=mhw5
Visit my channel for more repair videos; http://www.youtube.com/user/donyboy73?feature=mhw5
03:17 Stihl MS192T Chainsaw Repair (MUST SEE)
Watch this video to see what a clogged spark arrester screen will cause. Very easy repair.
Visit my channel for more repair videos; http://www.youtube.com/user/donyboy73?feature=mhw5
#donyboy73
Visit my channel for more repair videos; http://www.youtube.com/user/donyboy73?feature=mhw5
#donyboy73
12